In the age of digital photography, capturing stunning moments has become easier than ever. It can be frustrating and visually distracting when crooked or tilted photos reduce the overall appeal of your image.
In contrast, a few online image straighteners allow you to showcase professionalism. Fortunately, you no longer have to be an expert photographer or possess advanced editing skills to straighten your images.
Numerous online tools and editing software make the job easy and straighten images quickly and accurately.
This article will explore the same options, examining the techniques and tools available to bring harmony and balance to your photographs. So, stay tuned for some special tips on straightening pictures online and detailed steps for enhancing your images online.
What Do You Mean By Straighten Image?
Straighten image, or straightening an image, refers to the process of adjusting a photograph’s orientation. It ensures the scene’s horizontal and vertical lines appear straight and level. Straightened photo is common for images to have slight tilts or crooked horizons. It is due to the angle at which the photo was taken or a lack of proper alignment. Straightening an image involves rotating and aligning the image so that the prominent lines, such as horizons and buildings.
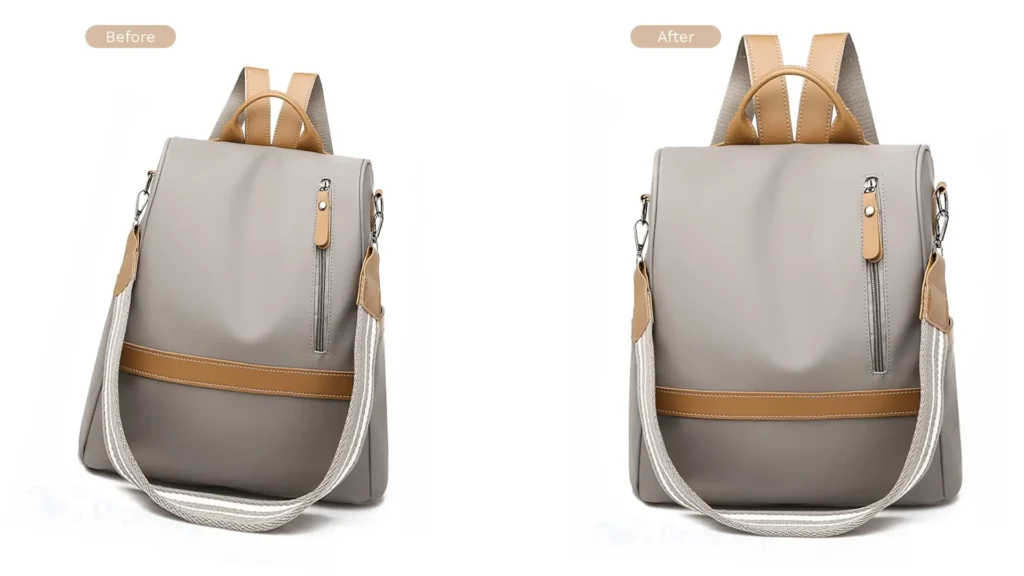
So, you still need to figure out what straightening images mean and what process you can avail of. Well, image straightening corrects any image tilt correction, slanted, or crooked composition in the picture. This is a boon when the camera isn’t leveled or adjusted well, and the perfect image is unbalanced.
Moreover, an online image straightener involves adjusting the horizon line or any other prominent vertical or horizontal elements in the photo to align them properly and create a visually pleasing and balanced composition.
Doing this eliminates distractions or distortions and ensures the image appears straight and aligned, as the photographer demands. Straightening the image satisfies the visual look and does photo tilt corrections. It is needed in various kinds of photography, for example, car photography.
Why do you Need to Straighten Photos?
Straightening pictures online not only brings balance and order to the optical clarity of it but also allows a viewer to focus on the beauty and quality features of your images. The straightened images hold various significant values, from the storytelling benefits to aesthetical uncoverings.
Let’s see what importance straightening a photo has and why you need it.
Aesthetics
We all would agree that crooked and slanted pictures do not contribute to the aesthetics of it; rather, it develops an uneasiness for the viewers. Straightening photos online drives the attention caused by misalignment and allows for a more harmonious and balanced look, enhancing the overall aesthetic of your pictures.
Professionalism
Whenever you are about to present your work to your clients and viewers, it becomes crucial to have perfectly aligned, detailed, and strived perfection. That is when straightening photos allow you to demonstrate your commitment to delivering high-quality pictures, giving you the upper edge and setting you apart from other professionals. This is important when editing product photography images as it has a larger audience.
Mistakes correction
Even if you are a professional photographer, multiple situations, such as shooting on uneven ground, hurried compositions, or limitations in capturing angles, can result in misaligned images. So, straightening your photos have photo tilt correction solutions, a solution for crooked pictures, and allows you to present your photographs as you originally intended to.
Composition And Balance
Visual balance is important in achieving a harmonious and balanced design and enhancing the eligibility and clarity of the image, aligning the horizons, verticals, and prominent lines in your photos. Straighten pictures online to create a symmetrically ordered representation of the subject.
Consistency
While you present your images in a series, say on a website or something, maintaining consistency and cohesion is important. It elevates the visual impact and narrates the thought story behind your click. Straighten images ensures seamless flow, making them more engaging and impactful for the viewer.
How to Straighten an Image?
Now that you have understood where you can straighten images and their importance let’s see how you can implement this in your pictures. So, you might ask, whether to do it manually or by using a specific set of software.
Let’s learn how to straighten pictures online, salvage those precious moments using a photo straighten tool, and present your photographs in all glory.
How to Straighten Images Manually?
We have curated comprehensive steps following which you can manually straighten images. Let’s have a look at such a few methods!
- Using The Cropped Tool
A cropping tool is a widely used method to straighten images online. Start by selecting the crop tool from the toolbar of any editing software you use. Then adjust the edges of your image by drawing a cropping box around it. This will straighten your composition, and you can go ahead and save it once you are satisfied.
- Rotating The Image
You can locate a rotation control tool in the same editing software, usually under the image or the transform menu. You can access this tool to rotate your image to certain degrees for photo tilt correction or use an interactive rotation to have a perfectly aligned picture.
- Using The Guideline Tools
The editing software usually has an in-build guidance tool that you can enable and then drag your images to align with prominent horizontal or vertical elements needed to straighten pictures online. Using this, you can rotate your crooked images until they align with the guidelines for a perfect output. Not having accurate images in car photography can have consequences for businesses, so follow guidelines to the letter.
- Manual Transformations.
Look for the transformation straighten tools in your software, such as move or scale. Then use them for an online image straightener for adjusting the image and resizing it until and unless it appears straight. You should maintain the image’s proportions carefully and avoid any distortions.
How To Straighten An Image Using Spyne?
As you know, Spyne is an AI-powered professional online image straightener and photo editing software that you can use for multiple image-enhancing purposes. Be it a personal use of cropping, photo tilt correction, straightening, or retouching of the images or a commercial context of experimenting with different perspectives to straighten images online.
Spyne’s online auto online picture straightener always gives your images a polished and professional look. Hence, you don’t have to worry about the post-straightening reviewing or adjustments. However, you can always opt for certain precise desired adjustments and manually straighten photos.
One of the best features of straightening images online using Spyne is that it saves the straightened image automatically for you on the desktop. So, no more worrying about your edited pictures being misplaced!
Steps for Straightening Your Photos Manually Without Spyne
Here’s a detailed yet comprehensive process of steps that you can follow to straighten images online.
Step 1: Open Image Editing Software
Start with installing image editing software on your computer to straighten images online. The popular software choices are spyne photo straightener or even the built-in ones.
Step 2: Importing The Image
The next step involves importing the image you want to straighten from your computer to the software’s working space. You can do this by clicking on the files and opening or using the drag-and-drop method. You can straighten curved image online by searching for a tool in Google.
Step 3: Selecting The Straightening Tool
Now you need to look for the straightening tool. You can also do this by typing in the search option or looking for a scale, protractor, or rotational symbol on the working dashboard. Once you find it, select the icon to enable the straightening tool. Any photo straightener app will work as long as it is easy to use.
Step 4: Identifying The Reference Line
This is one of the most crucial steps to straighten pictures online. You must identify a horizontal or vertical reference line in your picture, like a building or a bridge. Once you have a prominent straight line, start drawing a line along the reference line using the straightening tool.
This line you will draw must be parallel to the intended straightening angle in your image tilt correction.
Step 5: Rotating The Image
Based on your drawn image, the straightening tool will automatically estimate the angle needed to straighten the image. However, you can also use the rotation tool to control the desired degree of rotation needed for the image tilt correction or to align your image’s objects perfectly.
Step 6: Fine-Tuning
If you need to add more touch-ups, refer to the on-screen controls for refining and adjusting the image according to your visual appeal. Fine-tuning is an important part of editing a clothing photography image.
Step 7: Cropping The Image (Optional)
Now that you have perfectly aligned your image, you might see some void spaces around the photos caused during the process. So to avoid that, consider cropping the image and maintaining a clean composition. You can Google straighten photo without cropping online to get more information.
For more complex edits beyond straightening, an image manipulation service can help refine details, adjust colors, and enhance overall image quality with professional precision.
Step 8: Save The Straightened Image
Once you are satisfied with all the straightening, alignment, and cropping, it’s time to save your work. Click on the save icon in your software, press Ctrl + C, and keep your image in JPEG or PNG format.
That’s all! You have finally straightened your favorite picture that has been bothering you for quite some time. Another pro tip is to save your straightened image under a new name to avoid confusion while uploading or sending someone.
Features of Spyne’s Photo Straightener
Spyne, a leading AI-powered photo straightener tool, has multiple features you must know of for better access, from automatic online straighten photo, crop, and aspect ratio options to excellent grid leveling guides.
So, let’s explore some of the most prominent features of Spyne’s photo straightener.
Straighten the Image for Landscape or Portrait Mode
The processes are quite short, simple, and effective with Spyne’s photo straighten tools, landscape, or portrait mode. The only difference that may lie is in the reference lines or elements of alignments.
While using the landscape photo straightening mode to straighten image, Spyne always focuses on the horizontal line. In contrast, in portrait mode, the vertical reference lines are prioritized more to achieve a perfect alignment. However, in both modes, you are assured of attaining a well-composed image at the end
Can Edit Images in Multiple Formats (JPG, PNG, BMP, TIFF)
Accessing your image in various forms is a valuable asset in the digital world. Spyne allows you to edit photos in multiple formats, from JPG, PNG, and TIFF to BMP.
Having the luxury to straighten photos online in multiple formats empowers you to work seamlessly with diverse image sources and compatibility with extensive metadata support. Take particular care of this when dealing with fashion photography, as format matters.
Be it the widely used JPG format that balances quality and file size simultaneously to the versatility of PNG formats, Spyne’s photo straightening has all to offer. Another major benefit of this feature is that you can maintain the integrity of your image. This is because you don’t have to go through a format conversion through other plugins.
Automated Editing Makes Life Easy
This is one of Spyne’s photo straightener’s best features: it has an automated editing feature. So even if you are a newbie to editing and software, worry not; use Spyne’s AI and machine learning features to straighten photos in seconds. Spyne has got automated editing with sophisticated algorithms that not only analyze your images but also make the necessary adjustments automatically. The algorithms have a vast range of data, and common flaw pattern recognization, which results in the perfect composition of the miss-aligned images and image tilt correction.
The best part of Spyne’s automated editing feature is its ability to save time and effort yet not compromise the quality of the edited pictures. So, even for professionals, automated editing makes life easy by harnessing the power of AI and getting results just in a few clicks.
Compatible With all Web Browsers Across Devices
Whether you are a photographer or just a photo editor, Spyne’s online photo straighten tool has made sure to reach a significantly wider range of audience by being compatible with all web browsers. These include Chrome, Firefox, Internet Explorer, and Safari. You can also access Spyne’s photo straightener on multiple devices, from computer desktops, laptops, tablets, and mobiles, and easily straighten photos online.
So, the major benefit of having such compatibility with all web browsers across devices is to ensure access without limitation or technical issues.
Conclusion
In conclusion, whether you are an online retail brand or a photo editor looking for instant image tilt correction solutions, you now know what to refer to. You have many options, whether simple and intuitive editing or professional. Moreover, these online tools provide a convenient, user-friendly solution to straighten photos. It eliminates the need for complex software installations or extensive manual adjustments.
So, use online image straightening tools to enhance your visual content’s quality and appeal significantly. Also, start straightening your photos online with elevated quality and visual appeal your pictures.

