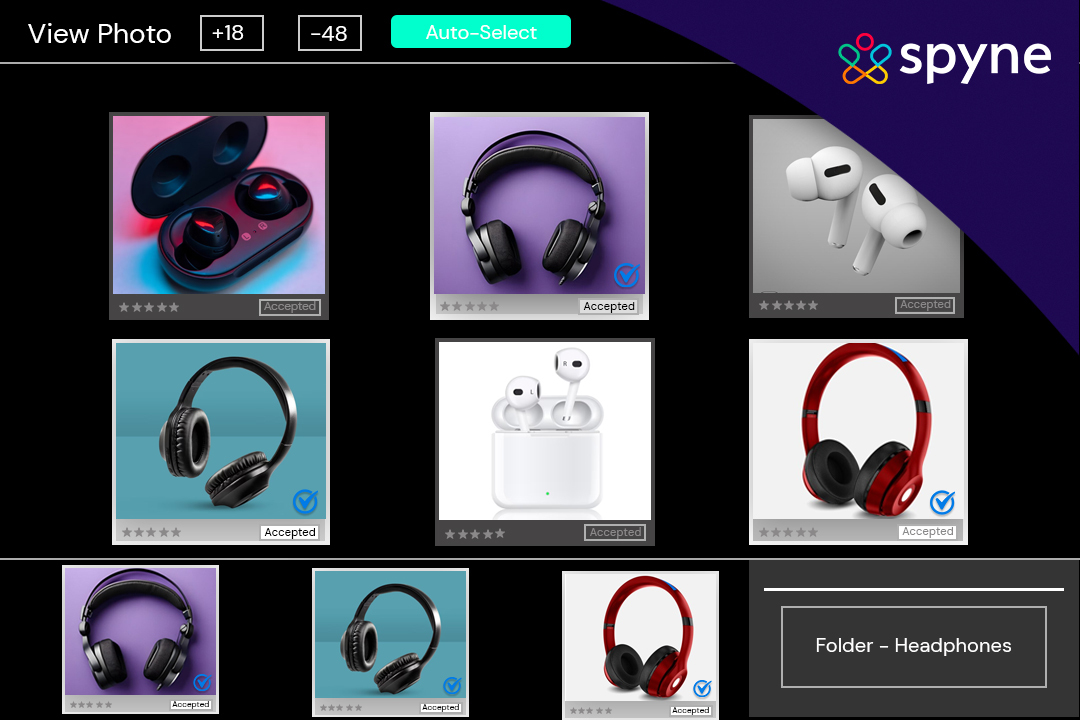
To become a pro photographer, you have to nail those editing techniques right from the get-go. If you don’t, you will waste a ton of time trying to build and expand your business. If you are new to photography, you might have heard the term “workflow” thrown around. Professional photographers swear by their editing workflows. It’s what allows them to excel at what they do. One of those workflows or processes is called photo culling.
This blog will take you through everything about photo culling and how Spyne offers the best in class photo culling service. Let’s dig in.
What is Photo Culling?
Photo culling photography involves sorting through photos and picking out the best ones. It’s like playing the ultimate judge for your shots. You carefully evaluate each image, considering composition, quality, focus, exposure, and overall look. The goal is to separate the best images from the subpar ones. By culling your photos, you streamline your workflow and save precious time. You want to ensure that only the top-notch photos make the cut for your sales or business purpose.
For instance, you or the professional photographer shoots around 900 images of your product for the catalog. But would you need all 900 of them? Are all of those captures the perfect one? That’s where image culling comes in. It will help you nitpick the best ones, eliminate the bad or average ones, and reduce your workload for the final editing and formatting.
Why is Photo Culling Important?
Product photography‘s first and foremost purpose is to create a compelling story for your brand through your product. That’s where culling photography comes in. It can be daunting to know where to begin, but it’s a crucial step in the process. By image culling, you eliminate photos that don’t meet your standards. During the culling process, you can narrow that massive 3,000-photo count to a more manageable 800. The whole point of culling is to help you select the most flattering and impactful photos. Here are some other reasons why you need to care about image culling.
Eliminating duplicates
When you are capturing a pose, it is common to end up with a bunch of images that seem almost identical. But you don’t have to edit or deliver every shot from every set. Instead, what you do is we cherry-pick only the cream of the crop, that is, the absolute best couple of images, or sometimes even just a single shot from each batch of duplicates.
Eliminating bad shots
Not every shot will be the best one. There will always be those bad images that don’t deserve a second glance. This mainly includes shadows, reflections on glasses, blurred images, lighting from angles gone wrong, and so on. The culling process will help you save time by discarding and deleting these images and keeping the best ones.
Save time when editing
Now that you’ve cleared out the subpar images, you are left with a select few ready for editing. This approach turbocharges your post-production workflow because you only focus on the pictures that you will cater to your audience. The culling process takes some time, but it’s a time-saver in the long haul. Just imagine spending minutes, maybe up to 15, editing an image only to realize it’s beyond saving.
What Makes Photo Culling so Hard?
Photo culling can be a real challenge for several reasons. First off, it can be tough on a psychological level. Choosing which photos to keep and which to toss can be a real struggle, especially when you are personally attached to the subjects or captured moments. It takes strict objectivity and the ability to separate your feelings from the task. Then there is the sheer volume of photos to sift through. Staring at hundreds or even thousands of images from a single shoot can feel like an overwhelming mountain. It eats up a ton of time as you carefully evaluate every shot.
On top of that, there’s that nagging fear of missing out. You worry that the photo you decide to toss might have actually turned into something extraordinary with a bit of editing or might hold some hidden potential you didn’t see at first glance. Let’s remember the subjective aspect of culling. Everyone has a distinct idea of what makes a photo worth keeping, so there’s no one-size-fits-all rule. It is all about your judgment and taste.
Lastly, there’s the pressure to deliver the absolute best to your audience. You want to showcase the best side of your product to shoppers and viewers and build a brand image around that. That adds an extra layer of stress to the whole culling process.
How to Cull Pictures?
Culling pictures can be a headache. Finding the right images from the whole catalog and then editing them can be lengthy, but knowing where to start and what steps are necessary can make things easier.
Here are three quick steps to kickstart culling photography.
Culling before editing
Cut out the back-and-forth hassle. Simplify your process by culling before editing. Trying to do both at once only complicates things and wastes time. So, put on your culling hat first, select the photos that need editing, and then dive into the editing process. Streamline your workflow and give each task the attention it deserves.
Be specific
One of the inherent challenges of culling your own photographs is the emotional attachment you may have to each image, making it difficult to determine which ones to reject. However, to ensure impeccable results, adopting a rigorous and discerning approach is critical. Approach this as if you were curating for someone else, setting specific criteria for selection while avoiding overthinking. Strive to choose only the finest captures from each scene, relying on your instincts to guide you toward excellence.
Chart and stick to a system
When it comes to culling, there are plenty of methods and software options. But to keep things smooth and efficient, you must find a process that clicks with you. It might take some time to figure it out initially, but it becomes second nature once you settle on a workflow that works for you.
How to Organize Thousands of images before culling?
- Start by setting up a folder structure on your computer. Create main folders for projects, dates, or categories, and use subfolders as needed. It will provide a transparent organizational system.
- Take advantage of culling software like Spyne AI or Adobe Lightroom. These tools make it easy to import and organize your images, add metadata, and apply tags or ratings for better sorting.
- Consider batch renaming your files to make them more identifiable. Include details like dates, project names, or unique identifiers to distinguish each file.
- Sort your images by date or event to tackle them in manageable batches. This helps you focus on one set at a time during the culling process.
- Remember to back up your files. Create a reliable backup system using external hard drives or cloud storage. It’s better to be safe than sorry.
What images should you cull?
Finding what image to cull or not to can be tough while photo editing. There are huge groups of images, and knowing which photo to exclude can speed up the process.
Duplicates
Duplicates are bound to happen if you frequently shoot in burst mode. You will end up with multiple images that look almost identical. Keep an eye out for those.
Blinkers
These can be a pesky issue, especially when photographing people in groups. It’s hard to spot blinking eyes, especially if the subjects are small in the frame. Try zooming in to 100% or use helpful photo-culling software to tackle this.
Out-of-focus shots
These are a no-go unless you intentionally aim for a blurred effect. Remove any images that lack proper focus.
Foul shots
If an image doesn’t please your eye or align with your style, it’s time to let it go. Be ruthless in removing any photos that don’t resonate with you.
How do you cull pictures quickly?
Set clear criteria
Establish your standards up front. Determine what makes an image worth keeping and what should be tossed aside. Having clear guidelines helps you make rapid decisions.
Utilize rating and flagging
Take advantage of your photo-culling app’s rating and flagging features. Develop a system that works for you, whether assigning star ratings or using color labels to indicate preference or quality.
Trust your instincts
Embrace the “Gut Reaction” method. Trust your initial impression of each photo and avoid overthinking. Let your instincts guide you to identify standout shots versus ones that fall short quickly.
Batch delete duplicates
If you have similar or nearly identical images, use batch selection and deletion tools to remove duplicates simultaneously. Save time by keeping only the best version.
Master keyboard shortcuts
Learn and employ keyboard shortcuts to navigate images, make selections, and switch between rating levels. These shortcuts can significantly speed up your culling process.
Take short breaks
Culling can be mentally taxing, so remember to take regular, brief intervals to rest your eyes and maintain focus. A refreshed mind helps you make swift decisions.
Why is automated culling better than manual culling?
All these steps we have discussed so far are highly manual in nature. This means you would have to sit and then select the pictures to be deleted from the huge pile of visuals. Then create folders and categorize them based on blurry or blinkers or duplicates. And then remove them. And then finally proceed to edit. If you can work with 15 images in 30 minutes, imagine how long it will take to deal with 200 images.
There’s more to it. Scanning through countless similar images to select the best ones can be an arduous task that only a few may find comfortable. It is time-consuming, and humans are also more prone to errors compared to computers and AI, which operate based on consistent commands and binary logic. Human error is one of the significant drawbacks of manual culling and is a compelling reason for people to turn to AI photo culling.
Speaking of which, the advantages of AI photo culling are undeniable. It eliminates the drawbacks associated with manual culling, such as stress, time consumption, and human error. The primary advantage lies in its automated system, which is incredibly consistent.
AI Photo Culling software can be faster, easier, and more convenient. It becomes your reliable companion that saves you precious time. Unlike most software that requires you to import raw images and store converted JPEGs on your machine, which eats up storage, AI Culling software simplifies the process for you.
How does automated image culling work?
Automated photo culling works through the power of advanced algorithms and artificial intelligence. Since the introduction of AI, every process in image processing has been simplified but the real question is, how is it done?
Here’s a simplified breakdown of how it operates:
Image recognition: The software uses computer vision technology to analyze the visual aspects of each image. It identifies subjects, colors, lighting, composition, and other visual attributes.
Filtering based on criteria: The software applies predetermined criteria or user-defined preferences to filter out images that don’t meet specific requirements. It looks for factors like focus, exposure, sharpness, facial expressions, etc.
Machine learning: Many AI culling systems utilize machine learning techniques. They learn from patterns and user feedback to enhance their accuracy over time. The software adapts and improves its selection process based on user preferences.
Smart selection: The software generates a curated collection of the best images using the collected data and analysis. It ranks them based on quality, visual appeal, and other relevant factors.
Automated photo culling dramatically speeds up the process by automating the initial sorting and selection stages. However, it’s important to remember that the accuracy and effectiveness of automated culling systems can vary depending on the culling software’s sophistication and the quality of algorithms employed. One software that can give you 100% accuracy and effectiveness is Spyne. We will talk more about Spyne in detail later on.
How does AI learn your preferences?
Comparing the AI to a child, it undergoes a learning process similar to teaching the alphabet, words, and sentences. It receives corrections, rewards for good performance, and reprimands for mistakes. With continued usage, the algorithm constantly evolves and improves, providing you with better results over time.
Focusing on the face or object
The AI algorithm acquires knowledge about sharp pixels in the photo. It can analyze your images and identify out-of-focus faces once it distinguishes between solid and unsharp pixels. These faces are then tagged as rejects, allowing you to quickly identify and exclude them from your selection.
Training phase
During the training phase, the AI algorithm is exposed to an extensive dataset of images accompanied by valuable user feedback. This dataset comprises examples of desirable or undesirable ideas based on specific criteria such as focus, lighting, composition, and more. The algorithm carefully studies these images and the associated feedback to identify patterns and understand the characteristics that contribute to user preferences.
Pattern recognition
With a wealth of data, the AI algorithm excels at recognizing patterns and correlations. It examines various visual attributes, such as sharpness, blur, facial expressions, and composition, and identifies the relationships between them and the feedback users provide. By detecting consistent patterns in the data, the algorithm starts building a foundation for understanding what users typically prefer or reject in their images.
Preference modeling
Armed with the knowledge gained from pattern recognition, the AI algorithm creates a preference model tailored to your tastes. It learns to recognize the types of images you find appealing and those you will likely discard. This model serves as a guide for the algorithm’s decision-making process during the culling stage.
User Feedback
Your input becomes invaluable as you engage with the AI photo-culling system. You actively refine the algorithm’s understanding of your preferences by offering feedback on the suggested selections. Your feedback is a vital source of information for the algorithm to learn from and adjust its recommendations accordingly. It’s a collaborative process where your insights help shape the algorithm’s ability to predict your preferences accurately.
Continuous improvement
The AI algorithm is designed to evolve and improve continuously over time. It incorporates user feedback on an ongoing basis to refine its preference model and enhance its selection process. By learning from positive and negative feedback, the algorithm becomes more adept at recognizing your unique preferences, resulting in increasingly accurate and personalized culling recommendations.
How to cull pictures with Spyne AI?
In ecommerce photography, editing and keeping the right image is important since the product image will be the main focus of any website. Spyne AI uses state-of-the-art automated tools to help you identify and keep the ones that are the best in quality. Spyne AI’s guided app with built-in validation and real-time image quality check enables you to cut down manual image culling hours and ensure you only upload best-in-class, converting product photos.
Now no more manual quality checking of images in bulk. Spyne AI can validate and quality checks millions of vendor images in just a few seconds, making it the best photo culling software. Spyne’s eCommerce photo editing features provide multiple parameters to help you deliver images that comply with marketplace images.
Over 100 computer vision models validate images at scale. The decision drivers when detecting pictures for photo culling mainly include
- Blur
- Crop
- Tilt
- Brightness
- Profanity
- Reflection
The Cherry on the top? This photo culling app will also assist you in producing images that your viewers and audience will love by allowing you to:
- Add background
- Implement margins
- Enhance resolution
- Add shadows
Does this interest you? Wish to learn more about photo culling? Or how Spyne AI is the perfect solution for your culling photography tasks? Reach out to us and book your free demo today!

